Friday, 21 December 2012

Animation wip

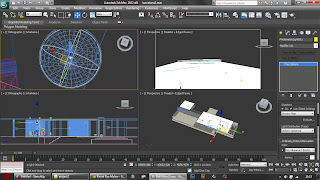
                                           Camera1 position at key frame 0
     Camera1 position at key frame 300

                                              Camera 2 position assigned to path at frame 14 using motion tab
                                             light intensity at key frame 0 assigned to zero.
Light intensity at key frame 300 assigned to normal light intensity around 270.
                             camera 3 path assigned to circle to film all arounf building.
                              Light object intensity at mininum at keyframe 0
                               Light object intensity at normal maximum at keyframe 300
                                      Sun position at keyframe 0
                                         Sun position at keyframe 300

Sunday, 21 October 2012

Project 2a Exterior rendering

 To start the model was download from google sketchup and imported to 3dmax. Then using snap the form was re done using box and line tool.
 For the floor, the main box was created and then by converting into poly and deleting polygons, the form was created.
 Concerning the window, a box was created and then using inset and extrude tool, the glass and frame were created.
 The sun was placed using proper daylight setting and the sun path was set to date, time and place.
The Vray camera was placed to get the 2 point perspective .
          The normal camera was placed to get a very good one point perspective with good composition.
                                            This is the water vray material created for the ponds.
                                          This is the setting for the glass vray material created
                             The above is the setting used to create steel vray material for the columns.

                The following are the bitmaps for the realistic materials used in the true barcelona pavilion.


 The above is the background used in the one point perspective view which be inserted as the background using Photoshop. Some adjustments will be made to make it more realistic, like the hue and the levels.
And this one is the background used for the 2 point perspective and like the previous one has be edited using Photoshop.

Thursday, 4 October 2012

Interior lighting- Portal tutorial

The use of a Daylight portal was demonstrated to let light penetrate into a space but also the placing of a camera inside the space.

Thursday, 27 September 2012

Project 1: Deformed Iron man helmet

From my tennis ball tutorial, I played with the steps to create another object.
From a 1000x1000x1000 box, the object is spherify and converted to and editable poly.

Select vertex and re scale x value to 60 and same on the opposite side vertex.
select loop vie edge and chamfer.

Chose the 2 polygons on the front and re scale z value to 60
Again the rescaling is done but this time on the y value: 90
select the 2 vertex, re scale, y value : 80
selected Polygon: bevel.
selected polygon: bevel
Modifier: meshsmooth
Modifier: turbosmooth
selected polygon: bevel
select edge and press loop
Convert to vertex and extrude

select vertex and move to create nose form
select polygon and extrude.
When finished I rendered the whole using v-ray hdri.
The second object was created by pressing shift and moving and the same time to create a copy.